Part1
InDesign is used to structure and layout work, for example; magazines, books, posters etc.
We were given a 2 hour tutorial session on how to use InDesign and to get to know the basic principles of the software. Like Photoshop and Illustrator a lot of the tools are very similar which came in handy when learning the basics of InDesign.
Like any adobe software you have to create a new document.
Clicking more options on the side opens up a section named 'Bleed and Slug'. This option allows you to edit the trimming of the page and allows you to add printing information, dotted lines for folds etc. The other options are similar to Ps. and Ai., Paper size, Columns, Margins etc.
One new option is 'facing pages', this is used to create books, if you want pages to print out in the correct number order then ticking 'facing pages' will print the document out in the correct order.
The pages pallet allows you to get an overview of the whole document, allowing for easy navigation around the screen. You can add extra pages by clicking the small symbol on the right hand side of the pages link, the symbol is 4 horizontal lines with a small down arrow.
Below is an example of 'facing pages'
Adding content:
In the Graphic Design industry when creating the layout of magazine's and other editorial publications its very rare that the designer writes there own columns. So adding someone else's text into the frame is something which InDesign is very useful for.
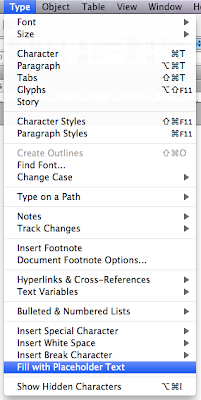
First if you create a text box, go into File and place. Find the text which you want to insert, click the file and the text will be imported into InDesign. If the text is to much for the text box there is handy little button which you can click which allows you to flow the text into another text box wherever you want onto the page. To do this, when the text box is too full, a red box will appear, clicking this allows you to place the rest of the text onto the page. You can also fill an empty text box with place holder text, which is just random text which allows you to see how the page is going to look with text in it. To do so go into Type - Fill with place holder text.

Images which are inserted into InDesign are usually prepared in Photoshop or Illustrator, here are the considerations before inserting the images from these two software:
Photoshop:
Consider the actual size of the image. Remember photoshop works in pixels, so any image in photoshop can not be stretched from its original size or you'll start to see the pixels.
The colour needs to be either CMYK or grey scale. This is for printing purposes.
The resolution needs to be 300 dpi.
The image file its self needs to be saved either as a Tif. or a Psd. NOT A JPEG.
Illustrator:
CMYK, again for printing purposes.
Remember to save as Ai.
Inserting an image is the same as inserting the text except there is no need to creating a box for the image to be placed into. Again go file, place, select your image and it will be imported onto the page. When adding an illustrator file you have to create a box using this tool:

The image will be imported into the net which has been created.
Part 2
InDesign and Photoshop:
When importing images into indesign you work with a low quality/ low resolution version of the image, this is the reason why images look pixelated. When placing on image we establish a link between the original image and InDesign file.
The tab at the right hand-side saying 'links' shows you where these 'established links' are. The images will be in a list and when clicking on a specific one it will take you straight to that image in the InDesign file. If you hover your mouse over the image in the link tab a yellow label pops up and tells you where the original image is. When you save the InDesign file the software finds the original copy of the image so when it comes to printing everything is the correct resolution. Remember to keep the files/ images that you work with in the same folder as the InDesign file so it can always find the correct image. The reason InDesign uses a low resolution copy of the image is so that the software runs faster.
When opening InDesign sometimes the original image file can be lost, or moved into a separate folder. If this is so a red hexagon will appear with a question mark inside it. In the links tab by the image this question mark will also appear. By double clicking the question mark you can open up the files your working with and re-link the image to the InDesign file.
If you go view - Display Performance - High display. The image will improve allowing you to see it in a higher quality, preparing for print.
You should prepare photoshop files before placing an image, but if the image happens to be to big you can use InDesign to re-size it. By clicking the image and clicking the circle in the center you will get a brown box around the image, By holding shift and dragging the transform markings you can make the image smaller.
By again clicking in the links palette and clicking on the image it gives you information on the image including the scale percentage at which you have transformed the image. If the file still needs to be edited in photoshop by right clicking and going to edit with you can open it up with photoshop.
By holding alt and double clicking on the image the image will automatically open up in photoshop.
By using the scale in the information section of the links palette you can correct the image so its the correct scale in photoshop before placing it back into the InDesign file.
When resizing the image in photoshop go to image - image size then change the percentage to what it was in InDesign:
Save the file in photoshop go back to InDesign and the image will update. If a yellow triangle appears with an exclamation mark inside it double click that and it will update the image.
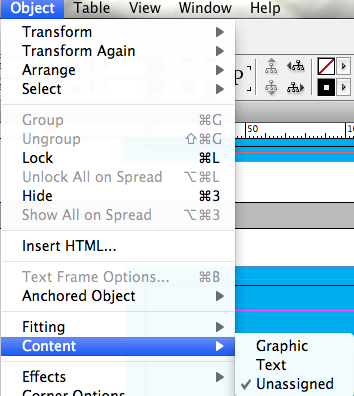
There are two frame when you place an image, theres the image itself and the frame which it is inside. Often the frame around the image is a little bit big and can get confusing if theres a lot of images in frames around the page. If you select the image and go to object - fitting - fit frame to content, the frame will snap to the frame of the image.
A useful shortcut key to use if you want to preview the file without all the image and text frames, and without margins etc is by clicking the W key. You can not be selected to a text frame when doing so.
When clicking W another palette will appear at the bottom of the tools palette. These options above allow you to select what you want to see. For example seeing the bleed margins by them selves or seeing the bleed margins with the slug markings.
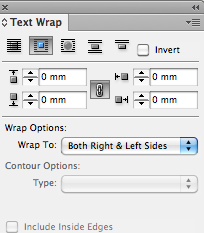
Often you may want to place an image in the middle of text but without covering the text up. To do so if you click the image to go window - text wrap.

Here is an example:
Another option in the text wrap box is 'Alpha Channel' Which can be found by clicking the third text wrap option, a second drop down box will appear called contour options which you can then select and the text will wrap around the image.
Example:
You can also change the shape of the text. By doing so if you select a specific frame from the frames tool:
If you open the text wrap options and select the third option and place the frame over the text the text will wrap around the object.
You can use the pen tool to create a frame, and you can select what you want the frame to be, i.e for a text or for an image

When using Illustrator art work you can copy and paste the image from illustrator into InDesign, allowing you to still edit the shape in InDesign.
You can also change your vector image into a text box:
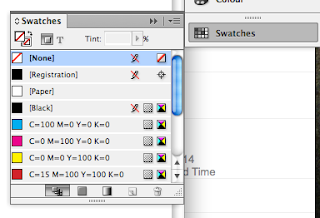
When adding colour there are two options, but it is advised you use the swatches palette.

Using the swatches palette allows you to keep a consistent range of colours. You can create a new swatch by clicking the arrow in the right hand corner of the swatch palette.
Printing in InDesign:
To print on the printer in the studio, if you click print, click the setup option and change the paper size to defined by driver. Then in the bottom left it says page setup, which you can then use to select the correct size of paper you are using.
When creating PDF's there are a few options:
[press quality] is the highest quality, [smallest file] compacts the file to its smallest size, [high quality print] which allows you to print good quality on the college printers.


No comments:
Post a Comment